Your Shark Ion robot vacuum is a workhorse, keeping your floors clean with minimal effort. But when its suction power starts to fade, you might notice it leaving debris behind or struggling with pet hair. Often, the culprit is a clogged or dirty suction motor. This isn’t a sign of failure; it’s a call for maintenance. Cleaning this core component can restore performance and extend your robot’s life significantly.
This guide walks you through the process safely and effectively. You’ll learn how to access, clean, and reassemble the motor. For this project, having the right tools on hand is key. Many professionals recommend using a Replacement Parts Kit which includes the specialized screwdrivers often needed. Its a smart investment for any robot vacuum troubleshooting you might do in the future.

Understanding Your Shark Ion Robot’s Suction System
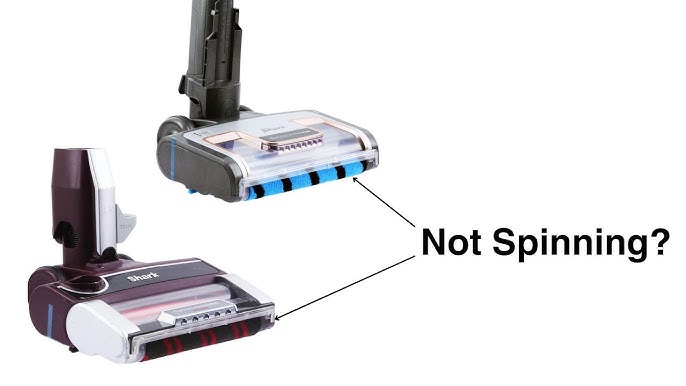
Think of your robot’s suction system as a pathway. It starts at the brush roll, which agitates debris. The powerful suction motor then creates a vacuum, pulling that debris through an airflow path into the debris compartment. Before air reaches the motor, it passes through a HEPA filter to trap fine dust. A blockage at any pointespecially in the motor’s intakecauses suction power loss.
Unlike some competitors like iRobot, Shark Ion models often have a more integrated design. Knowing the specific path helps you diagnose issues. Is the dust bin full? Is the HEPA filter clogged? Or is the motor itself jammed? We’ll tackle the motor, which is the heart of the system. Identifying your specific model number (usually on the bottom) is helpful, as disassembly can vary slightly.
Tools and Safety Precautions You’ll Need
Before you start, gather your tools. This isn’t just about having a screwdriver. You’ll need the right ones to avoid stripping screws, a common headache in vacuum robot repair.
Essential Tools & Materials
- Precision Screwdriver Set: You will almost certainly need Torx drivers (often T8, T9, or T10). A set with multiple sizes is ideal.
- Clean, dry microfiber cloths
- Compressed air can (optional but very helpful)
- Small, soft-bristled brush (a clean paintbrush works)
- Multimeter (for advanced troubleshooting, which we’ll cover)
Critical Safety Steps
- Power Down Completely: Turn the robot off using its power button. Then, locate the battery compartment and remove the battery. This is non-negotiable for safety.
- Work in a Clean, Well-Lit Area: A large table with good lighting helps you keep track of small screws and parts.
- Be Gentle: Plastic clips and connectors are delicate. Use firm but careful pressure. If something doesn’t want to come apart, check for hidden screws.
- Take Photos: Use your phone to snap pictures at each step. This is your best guide for reassembly.
Step-by-Step Guide to Cleaning the Suction Motor
This is your core suction motor cleaning procedure. We’ll address the common question: how to clean shark ion robot suction motor step by step without causing damage. Patience is your most important tool here.
Step 1: Accessing the Motor Housing
First, remove the debris compartment and the HEPA filter. Set them aside for cleaning later. Flip the robot over. You’ll need to remove the bottom plate, which is held by several screws (likely Torx). Carefully lift the plate away, minding any wire connectors for the brush roll or side brushes. You should now see the motor housinga cylindrical unit often held by a few more screws or brackets.
Step 2: Removing and Inspecting the Motor
Disconnect any electrical connectors leading to the motor. They usually have a small tab you press to release. Note their orientation. Unscrew the motor from its housing. Once free, inspect the motor’s intake and exhaust ports visually. You’re looking for packed dust, hair, or large debris causing a motor blockage.
Step 3: The Cleaning Process
Never use water or liquid cleaners on the motor. This can destroy it. Here’s the best way to clean shark ion robot motor without damaging it:
- Use compressed air to blast debris out of the motor’s ports. Always hold the can upright and use short bursts.
- Use your soft-bristled brush to dislodge stubborn particles. Gently brush the fan blades inside the intake if visible.
- Wipe the exterior of the motor housing with a dry microfiber cloth.
- While the motor is out, use compressed air to clean the cavity it sits in, clearing the airflow path.
This is also the perfect time to clean the brush roll assembly and the HEPA filter separately with water (let the filter dry completely for 24 hours).
Reassembly and Testing Your Robot
Reassembly is the reverse of disassembly. Use your photos as a guide. Ensure all electrical connectors click firmly into place. Screws should be snug but not overtightened. Before you put the bottom plate back on, reinsert the battery.
Now for the moment of truth. Turn the robot on. Does the motor sound smooth and powerful? Or is it straining or silent? Place your hand over the suction inlet near the brush roll. You should feel strong suction. If not, you may have a deeper issue.
Advanced Check: Using a Multimeter
If your shark ion robot suction motor not working after cleaning, a multimeter can check for power. Set it to DC voltage (likely 12V or 14.4V depending on your model). With the robot on, carefully touch the probes to the motor’s connector terminals. No power means a board or wiring issue. Power but no spin means the motor itself may be faulty. For detailed electronics repair guides, communities like iFixit’s vacuum cleaner repair section are invaluable resources.
Preventive Maintenance and Troubleshooting Tips
Regular care prevents most major problems. Consistent Shark Ion robot maintenance is simpler than a full vacuum motor cleaning guide repair.
| Symptom | Likely Cause | Quick Fix |
|---|---|---|
| Reduced suction, leaves debris | Clogged filter or full bin | Empty bin, wash & dry filter weekly |
| Whining or straining noise | Motor blockage or jammed brush | Clear brush roll, check motor intake |
| Robot moves but no suction | Motor not receiving power or failed | Check connectors with multimeter |
| Error beeps or lights | Often a brush or wheel obstruction | Clear hair from all moving parts |
Make a habit of checking the main brush and side brushes for tangled hair after every few runs. This simple act protects the suction motor from overworking. For a deeper dive into which Shark Ion model might be best for your home’s specific needs, our guide on the best Shark Ion robot vacuums breaks down features and performance. And if you’re curious about a specific popular model, our Shark AV751 Ion Robot vacuum review offers detailed insights.
Cleaning your Shark Ion’s suction motor might seem daunting, but it’s a logical process. You’ve learned to diagnose suction power loss, safely disassemble the unit, and perform a thorough clean robot vacuum motor procedure. Most importantly, you now know how regular, simple maintenancelike cleaning filters and brushescan prevent the need for frequent deep cleans. Your robot is an investment. With this knowledge, you’re equipped to keep it running powerfully for years, ensuring it continues to handle the daily grind so you don’t have to.