Keeping your Shark Navigator running at peak performance comes down to one key maintenance task: changing the filters. Its not just about suction; its about protecting the motor and ensuring the air in your home stays clean. A clogged or old filter is the most common culprit when your vacuum starts to lose power or sounds strained.
For many owners, having a spare set on hand is the smartest move. Instead of waiting for a dirty filter to cause problems, you can swap it out immediately. For this project, many professionals recommend using the 2 4 Pack of genuine Shark replacement filters, which provides excellent value and ensures perfect compatibility.
Understanding Your Shark Navigator Filter System
Your Shark Navigator isn’t powered by just one filter. It uses a multi-stage filtration system designed to trap dust and allergens. The two main filters you need to know are the pre-motor filter and the post-motor filter (often a HEPA filter). The pre-motor filter protects the vacuum’s engine from large debris, while the post-motor HEPA filter captures microscopic particles before air is exhausted back into your room.
This system is what makes bagless vacuums like the Shark Navigator and Shark Navigator Lift-Away models so effective for allergy sufferers. Proper vacuum maintenance of both filters is non-negotiable for sustained vacuum suction and airflow restoration.
Identifying Your Filter Type and Model
Not all Shark Navigator filters are the same. The specific filters you need depend entirely on your vacuum’s model. You can’t just buy any “Shark filter” and expect it to fit. This is where knowing your model number is critical.
Find the model number on a label on the back or bottom of your vacuum’s main body. It will look something like “NV352” or “NV586.” Write this number down. Then, cross-reference it on the official Shark website’s parts section or on the packaging of replacement filters. This simple step solves most issues related to shark navigator filter not fitting properly.
- Foam & Felt Filters: Common as pre-motor filters. The foam is washable, but the felt layer is not.
- HEPA Filters: Typically the post-motor filter. These are not designed to be washed, only replaced.
- Filter Housing: The plastic compartment that holds the filters. Make sure it’s clean and latches securely.
Step-by-Step Shark Navigator Filter Replacement Guide
Replacing your filters is a straightforward five-minute job. Always unplug your vacuum before starting.
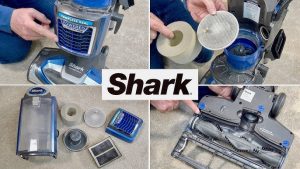
1. Accessing the Filter Compartment
On most Shark Navigator uprights, the filter compartment is at the front of the vacuum’s body, near the floor. For Shark Navigator upright models, you’ll usually press a button or release latch to open a door. On Lift-Away or Shark Rotator models, the filters may be located in the canister or pod section.
2. Removing the Old Filters
- Open the filter door or lid.
- Carefully pull out the pre-motor filter (usually foam/felt).
- Behind it, you’ll find the post-motor HEPA filter. Gently remove it as well.
- Take this opportunity to wipe out the empty filter housing with a dry cloth to remove any loose dust.
3. Installing the New Filters
Insert the new post-motor HEPA filter first. Ensure it sits flat and all edges are sealed by the housing. Next, place the new pre-motor filter in front of it. Close the compartment door firmly until it clicks shut. A proper seal is essential for airflow restoration.
4. Resetting the Filter Indicator (If Equipped)
Some newer Shark models have a filter reset indicator light. After a HEPA filter replacement, you may need to reset this light. Consult your manual, but it often involves holding down a combination of buttons on the handle for 3-5 seconds until the light turns off.
Troubleshooting Common Filter Issues
Even after a change, you might run into problems. Heres how to solve the most frequent ones.
Vacuum Losing Suction After Filter Change
If you experience shark vacuum losing suction after filter change, don’t panic. First, double-check that you removed all packaging from the new filters. Then, reopen the compartment and verify both filters are seated perfectly. Even a slight misalignment can break the seal. Also, ensure the canister and all hose pathways are clear of blockages.
Filter Not Fitting Properly
This almost always means you have the wrong filter for your model. Re-check your vacuum’s model number against the filter package. Also, ensure you’re not trying to install a filter meant for a different Shark series, like a Rotator filter in a Navigator.
Unusual Noise or Reduced Performance
A whistling or straining sound often points to an airflow blockage. Turn off and unplug the vacuum. Conduct a full check: empty the dust cup, inspect the hose, brush roll, and both filter ports. A single piece of debris lodged in the airway can mimic a filter problem.
Maintenance Schedule and Best Practices
So, how often to change shark navigator filter? It’s not just about time; it’s about usage.
| Filter Type | Cleaning Frequency | Replacement Frequency |
|---|---|---|
| Pre-Motor Filter (Foam/Felt) | Every 1-2 months (Rinse with cold water, air dry 24+ hours) | Every 6-9 months, or if damaged |
| Post-Motor HEPA Filter | Do NOT wash. Tap gently to remove loose dust. | Every 9-12 months for optimal allergen reduction |
Cleaning vs. Replacing: Know the Difference
You can extend the life of your pre-motor filter by washing it. But you must let it air dry completelyfor a full daybefore reinstalling. A damp filter will choke airflow and can mold. The HEPA filter, however, should never be submerged. Light tapping is the only cleaning it should get. Knowing this distinction is a key part of effective vacuum maintenance.
Optimizing Performance and Allergen Reduction
Your filter’s condition directly impacts its ability to trap allergens. A fresh HEPA filter captures over 99.9% of particles, including pollen and pet dander. As it loads up, that efficiency drops. Sticking to a replacement schedule isn’t just about suction; it’s about maintaining your vacuum’s role as an air-cleaning appliance. This is a missing entity many guides overlook: the direct impact on allergen reduction.
When looking for where to buy shark navigator replacement filters, always opt for genuine Shark filters or certified compatibles. Off-brand filters may not meet the same sealing or filtration standards, compromising performance and potentially voiding your warranty.
Keeping Your Navigator in Top Shape
Changing your Shark Navigator filter is the simplest way to guarantee powerful, consistent cleaning. It protects your investment and your indoor air quality. Listen to your vacuuma change in sound or power is its way of asking for help. Keep your model number handy, understand the two-filter system, and don’t wait until performance suffers. With a spare set like the 2 4 Pack in your closet, you’re always ready for a quick swap. Your vacuum will thank you with years of reliable service.