Your Shark vacuum’s performance hinges on a single, hardworking component: the brush roller. This spinning bar is the workhorse that agitates carpet fibers and pulls dirt into the suction path. When it stops spinning, gets clogged with hair, or simply wears down, your cleaning power plummets. Knowing how to change brush roller shark vacuum is a fundamental skill for any Shark owner. It saves you money on service calls and keeps your machine running like new for years.
This guide walks you through the entire process. You’ll learn how to remove brush roller, identify the correct replacement part, and install new brush. We’ll also cover troubleshooting and maintenance. For this project, having the right part is half the battle. Many professionals recommend using the Replacement Parts Roller available on Amazon, as it’s compatible with many popular Shark models and offers a reliable, cost-effective solution.

Why Brush Roller Maintenance Matters
Think of the brush roller as the heart of your vacuum’s cleaning system. A clean, freely spinning roller maximizes agitation and airflow. A neglected one causes poor pickup, overheating, and can even strain the motor. Regular maintenance isn’t just about fixing a problem; it’s about preventing one. Whether you have an upright Shark Navigator, a cordless stick model, or a powerful Rotator, the principles are the same. The goal is to restore that powerful, deep-cleaning performance you bought the vacuum for in the first place.
Tools & Parts You’ll Need for the Job
Gathering the right items before you start makes the process smooth and frustration-free. You likely have most of these tools already.
- Screwdriver (Phillips head is most common, but check your model)
- Replacement brush roller (OEM or compatible third-party)
- Replacement drive belt (often sold with the roller or as a kit)
- Scissors or seam ripper for cutting wrapped hair and threads
- Clean cloth and a damp paper towel
- A well-lit, flat workspace
The most critical step is getting the correct part. Always locate your vacuum’s model number first. It’s usually on a sticker on the back or bottom of the main body. Cross-reference this number with Shark’s official parts site or a reputable retailer. Using the wrong part can lead to poor fit and performance. Consider whether you want an official Shark OEM part or a third-party alternative; OEM guarantees fit but often costs more, while third-party can be a great value if from a trusted seller.
Identifying Your Shark Model Series
Shark has several main series, and the access brush roller method can vary. Common series include the Navigator (lift-away models), Rotator (powerful uprights with advanced swivel), Vertex (premium uprights with DuoClean), and the various cordless ION and Rocket sticks. Your model number will tell you exactly which series you own. This is a key missing entity many basic guides overlook, leading to user confusion.
Step-by-Step Replacement Guide
Follow these steps carefully. If you get stuck, referring to a detailed visual guide like those found on iFixit’s comprehensive vacuum cleaner repair resources can be incredibly helpful.
Step 1: Safety First & Preparation
Unplug the vacuum. For cordless models, remove the battery. This is non-negotiable. Lay the vacuum on its back on a flat surface. Clear the area around you so you have room to work and won’t lose any small screws.
Step 2: Access the Brush Roll Chamber
For most Shark uprights, you’ll need to remove the bottom plate. Flip the vacuum over. You’ll see several screws holding a plastic cover in place over the brush roll. Use your screwdriver to remove these screws. Set them in a safe spot. Gently lift off the plate to reveal the brush roller and belt assembly.
Step 3: Remove the Old Brush Roller
You’ll see the brush roller held in place by two end caps or brackets. These typically slide or clip out. Carefully release them. The roller will now be loose but may still be held by the stretched drive belt. Gently slide the belt off the motor shaft (the small plastic wheel). You can now lift the old brush roller straight out. This is the perfect time to inspect the area for any obvious clog or debris.
Step 4: Install the New Brush Roller
Reverse the removal process. First, place the new drive belt onto the motor shaft if you’re replacing it. Then, slide one end of the new brush roller into its housing. Stretch the belt over the end of the brush roller’s shaft. It should fit snugly. Finally, secure the other end of the roller by clicking or sliding the end cap back into place. Ensure the roller spins freely by hand; it should rotate without rubbing or catching.
Step 5: Reassemble and Test
Replace the bottom plate and screw it back in securely. Don’t overtighten the screws, as you could strip the plastic threads. Stand the vacuum upright, plug it in (or reinsert the battery), and turn it on. Listen for the smooth hum of the brush roller spinning. Run it on a bare floor or low-pile rug for a moment to confirm operation. Congratulations, you’ve successfully completed a shark vacuum brush replacement!
Troubleshooting Common Brush Roller Issues
Sometimes, a simple replacement doesn’t solve the problem. Heres how to diagnose other common issues.
Brush Roller Not Spinning After Replacement
If your shark vacuum brush roll is still not working, don’t panic. First, double-check the belt installation. Is it properly seated on both the motor shaft and the roller shaft? Is it the correct belt for your model? Next, check for obstructions. A severe clog in the hose or airway can cause a safety shut-off that stops the brush roll. Finally, manually spin the roller with your hand. If it’s very difficult to turn, the new roller’s bearings may be faulty or it may be misaligned in its housing.
Identifying the Correct Replacement Part
Confusion over parts is the biggest hurdle. Your model number is king. For example, a Shark NV352 Navigator lift-away uses a different roller than a Shark AZ910 Rotator. Official Shark part numbers look like “XHF-350” or “VACMOP-BRUSH”. Searching with your full model number plus “brush roller” is the most reliable method. This directly addresses the search intent behind queries like where to buy replacement brush roller for shark vacuum.
Maintenance Tips & When to Replace Again
Proactive care extends the life of your new brush roller and your entire vacuum.
- Clean brush roll monthly. Use scissors to cut and remove hair and string wrapped around the ends. This is the single most effective maintenance task.
- Check the belt every 3-6 months for signs of wear, stretching, or cracking.
- Clear the chamber of debris each time you clean the roller to prevent clog buildup.
- Listen for changes in sound. A high-pitched whine or grinding noise often signals a problem.
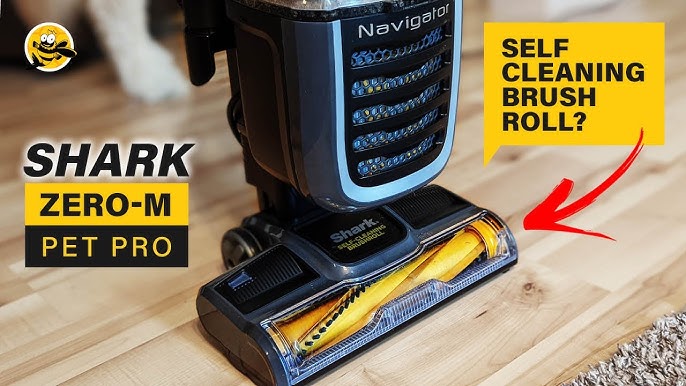
For homes with lots of pet hair or long human hair, consider a model designed to handle it. Our guide to the best anti-wrap Shark vacuum for long hair highlights machines that minimize this very issue. Similarly, for ultimate convenience, Shark vacuums with a self-cleaning brushroll can drastically reduce maintenance time.
When to Replace the Brush Roller
A brush roller is a wear item. Even with perfect care, the bristles will eventually wear down and become less effective. Replace it when:
| Sign | What It Means |
|---|---|
| Bristles are visibly worn short or bent | Reduced carpet agitation and dirt pickup. |
| Roller makes consistent loud noise | Bearings are likely failing. |
| Vacuum leaves lines or doesn’t “grab” carpet | The roller isn’t spinning at the correct speed or making proper contact. |
| Frequent belt breaks | A seized or difficult-to-spin roller is putting excess strain on the belt. |
You now have a complete replacement guide. You know how to change shark roller brush, solve a shark brush roller not working, and perform essential shark vacuum maintenance. This knowledge turns a seemingly complex repair into a straightforward 15-minute task. Keep your model number handy, perform regular check-ups, and your Shark will reward you with reliable, powerful cleaning for its entire lifespan. Your floors will thank you.