Your Shark Rocket vacuum is a powerful cleaning partner. But that power depends on a clean roller brush. When hair, string, and debris wrap around it, performance plummets. You might notice reduced suction, strange noises, or the brush simply stops spinning. Regular cleaning is the simplest form of vacuum maintenance you can do.
This guide walks you through the entire process. We’ll cover how to safely remove and clean roller brush assemblies, tackle stubborn pet hair, and get your vacuum running like new. For this project, having the right tools makes a huge difference. Many professionals recommend using a dedicated cleaning kit like the Tweruna 4 PCS set, which includes handy picks and brushes designed for this exact task.
Why Cleaning Your Shark Rocket Roller is Non-Negotiable
Think of the roller brush as the heart of your vacuum’s floor cleaning. It agitates carpet fibers and sweeps hard floors. A clogged brush roll strains the motor, overheats the drive belt, and blocks the suction path. This is often why your vacuum not working properly. For owners of specific models, like those looking for the best Shark Rocket vacuum for hardwood floors, a clean roller is even more critical to prevent scratching.
Neglect can lead to costly repairs. While self-cleaning is encouraged, be aware that improper disassembly causing damage might have warranty implications. Always consult your manual first.
Step 1: Safety First & Preparing Your Workspace
Always unplug your corded Shark Rocket or remove the battery from cordless models. This seems obvious, but it’s the most important step. Clear a well-lit space on a table or counter. Gather your tools:
- Scissors or a seam ripper
- Tweezers or a hook tool (like those in the Tweruna 4 PCS kit)
- A soft-bristled brush or old toothbrush
- A lint-free cloth
- Mild dish soap (optional, for deep cleans)
Having everything within reach streamlines the process. You’re not scrambling for tools with greasy hands.
Identifying Your Shark Rocket Model
Shark Rocket vacuums come in various types: Stick Vacuums, Cordless Vacuums, and DuoClean models which function like Upright Vacuums. The roller removal process is similar across most, but checking your user manual is wise. Knowing your model helps if you ever need to find official Shark part numbers for replacements.
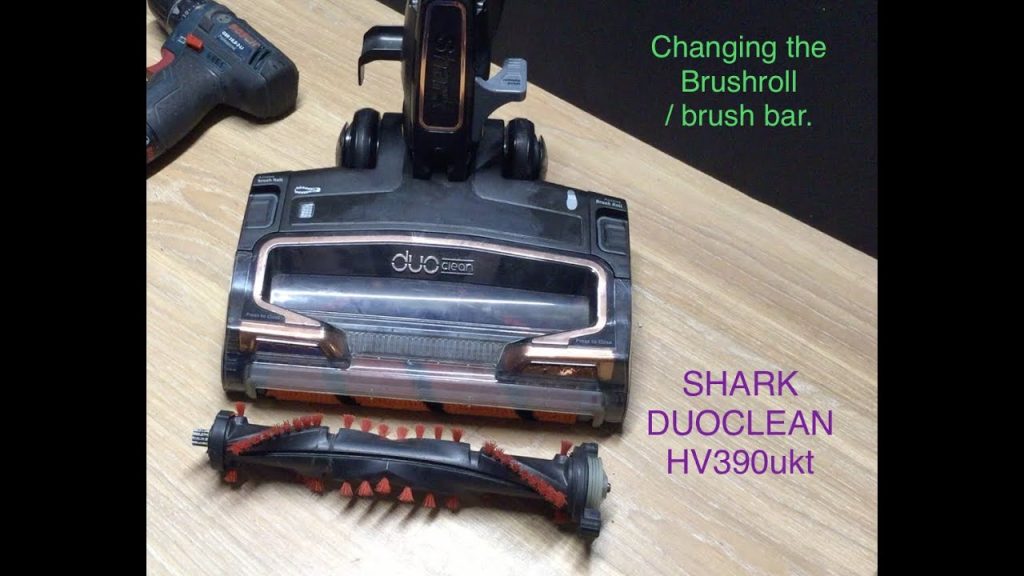
Step 2: Removing the Roller Brush from the Vacuum
Now for the hands-on part. Lay the vacuum on its back so you can access the underside. Locate the release latches or screws on the brush cover. These are often on the sides. Depress the latches or use a screwdriver to remove the cover, exposing the brush roll.
You’ll see the roller brush seated in its brush housing. To remove it, you typically press the plastic tabs on either end cap and lift the brush out. It should come free easily. If it’s stuck, don’t force itthere’s likely a massive hair wrap holding it in place. Gently cut and pull the debris first.
Step 3: Deep Cleaning the Roller and Housing
With the shark rocket brush in hand, the real work begins. Use your scissors or seam ripper to cut through the wraps of hair and string along its length. Pull the debris away. For fine dust and hair embedded in the bristles, a cleaning tool like a stiff brush is perfect.
To Soap or Not to Soap?
Here’s a comparison of cleaning methods. For routine maintenance, dry brushing is sufficient. For a grimy roller, use a damp cloth with a drop of mild soap to wipe the plastic barrel and end caps. Avoid soaking the brush or getting the bearings wet. Rinse the cloth and wipe away soap residue. Let it air dry completely.
Don’t forget the brush housing! Use your brush or tweezers to clear the channel where the roller sits. Check the suction path opening for blockages. This is a common spot for larger debris to get stuck.
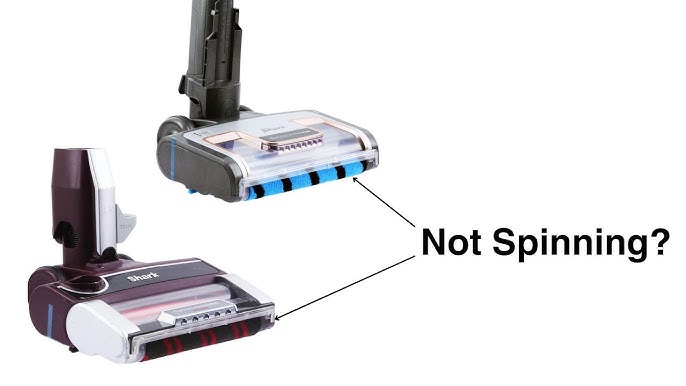
Troubleshooting: Shark Rocket Vacuum Roller Brush Won’t Spin
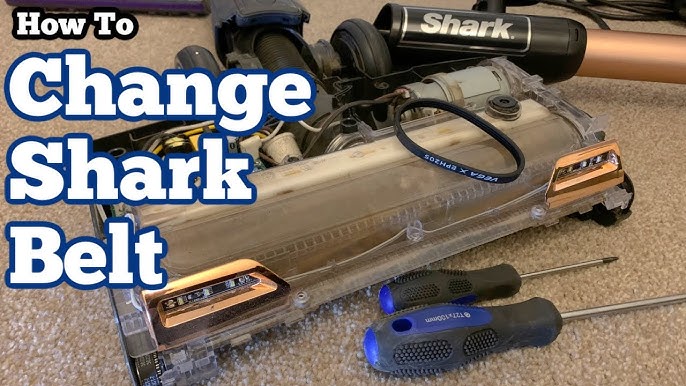
If your shark rocket vacuum roller brush won’t spin even after cleaning, inspect the drive belt. It’s a small rubber band that connects the motor to the brush. Look for signs of wear, stretching, or snapping. Also, check that the end caps rotate freely. A seized bearing will stop everything. For complex repairs, resources like iFixit’s vacuum cleaner repair guides can be invaluable.
Step 4: Reassembling and Testing Your Vacuum
Once the roller and housing are spotless and dry, it’s time to reassemble. Slide the brush roll back into the housing, ensuring the end caps click into place on both sides. The belt should be looped correctly around the motor spindle and the brush. Replace the cover until it snaps or screws back securely.
Now, test the vacuum. Turn it on and listen. The brush should spin quietly and freely. Run it over a small patch of carpet or floor to ensure it’s agitating and sucking properly. If you hear scraping or the brush hesitates, power off and re-check the installation.
Step 5: Maintenance Schedule and Pro Tips
A good maintenance schedule prevents most problems. For homes with pets or long hair, check the roller every two weeks. For others, a monthly inspection is adequate. Don’t wait for performance to drop.
| Situation | Recommended Cleaning Frequency |
|---|---|
| Multiple pets or long-haired residents | Every 1-2 weeks |
| Average home with carpets | Every 3-4 weeks |
| Primarily hard floors | Monthly |
| After a major project or spill cleanup | Immediately after |
Expert Pro Tips for Longevity
- Pre-Cut Wraps: Before removing the roller, use scissors to cut hair wraps along the brush’s length. It makes extraction much easier.
- Belt Check: Every time you clean the roller, give the drive belt a visual check for cracks or glazing.
- Tool Investment: A dedicated kit saves time and frustration. The right tools protect the vacuum’s components from accidental damage during cleaning.
- Know Your Model: Whether you have a standard stick or a premium model like those in our best Shark Rocket vacuum roundup, knowing its specifics helps.
Keeping your Shark Rocket’s roller clean isn’t just a chore. It’s the key to maintaining peak suction, protecting your investment, and ensuring every clean is effective. The process takes less than 10 minutes once you’re familiar with it. Listen to your vacuum. A clean hum means a happy machine. A strained whir means it’s time for a check-up. Make this simple ritual part of your routine, and you’ll rarely face a vacuum not working crisis again.